The modern alternatives (mylar, plastic pin types etc) seem to have replaced sewn hinges. There are much quicker methods to hinge surfaces. However, I find them a lot easier than the plastic pinned ones, as there is no need for slots to be cut, cutting a 1mm wide slot in a 3mm rudder is bound to end in tears!
They’re brilliant for all sheet surfaces, and really look the part on vintage models.
I use them on control line and radio control models. As long as the holes are drilled with reasonable accuracy, it’s very difficult to end up with a messy and unsightly hinge, unlike bandage!
It seems like this method has been forgotten, so here’s a quick guide on how I hinge control surfaces.
Introduction
For this example, I’ll be hinging a tailplane/elevator for my latest experimental model – a small, electric pylon racer/ sports model. I hope to add plans later, if it flies! (Update, it didn’t fly)
The tailplane and elevator are both cut from medium 3/32″ (2.4mm) balsa, with a span of roughly 270mm (to give you an idea of the scale).
Drilling Holes
This example uses a spacing of 7mm between holes, about 5mm from the hinging edge.
For your model, I’m afraid you’ll have to stick with trial and error, and what looks “about right”. Avoid using too many holes, as this will put un-necessary load on the servo and could end up splitting the wood.
Offset the holes away from the hinging edge depending on the material. Move the holes further in for soft balsa, whilst plywood is strong enough for the holes to be only a few mm from the edge
The holes should be drilled to give the stitches a 45 degree angle or less
There is no science in what’s written above, it’s just worked for me.
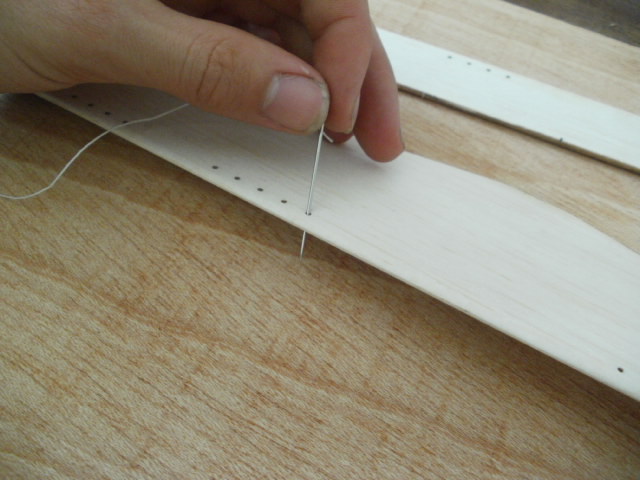
I find it easiest to mark out a line with a ruler 5mm (in this example) from the hinge line, then mark the hole positions along this line. Alternatively, make a jig from brass angle section – just a hole in a bit of angle section, which can be drilled through into the part, giving a consistent offset
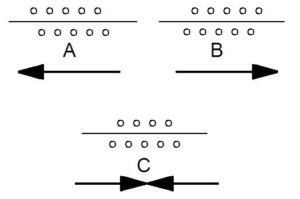
Use a different number of holes on the stationary surface than on the moving one (see example). Using the same number of holes will try to offset / move the surface left or right, once the string has been tightened. It’s difficult to explain in words, so here’s a diagram.
Thread and Tools.
You’ll see in the example I use a fairly thick thread – this is Cox control line wires. The name of the material is Dacron. I assume it’s polyester based, all I know is that it’s very strong. If you dont have any Dacron, use thick polyester thread or thin, braided fishing line. Kite string works too
As a guide, the example below used 12″ of thread. If in doubt use more.
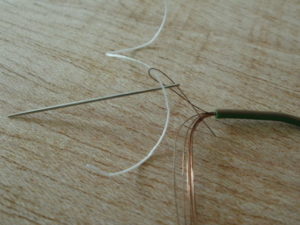
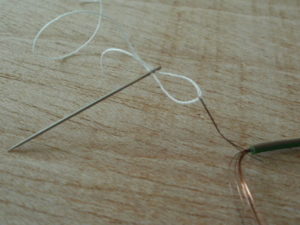
Tip – Threading a needle with thick thread is a pain, so I push a loop of copper wire (one strand from normal electrical cabling) through the eye, thread the string through the eye and pull out the wire. The copper loop pulls the thread through
Step by step instructions
Hopefully, this will explain how to make sewn hinges. If you’re still stuck and need help, email me at oliver(at) topcocameley1(d0t)com
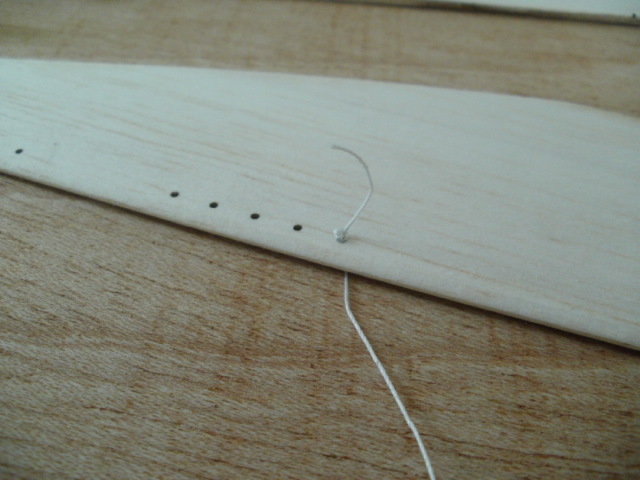
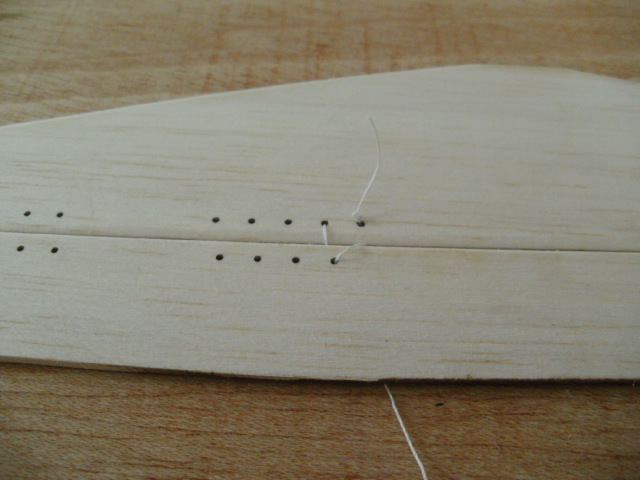
Step 1 Thread the needle and pull thread through the first hole.
Step 2 Knot the end of the string with a double knot.
Step 3 Pull the string around to the top of the tailplane, so that it double-backs on itself.
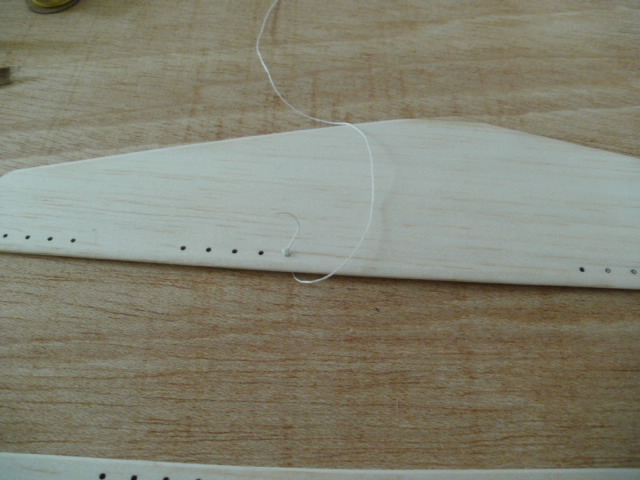
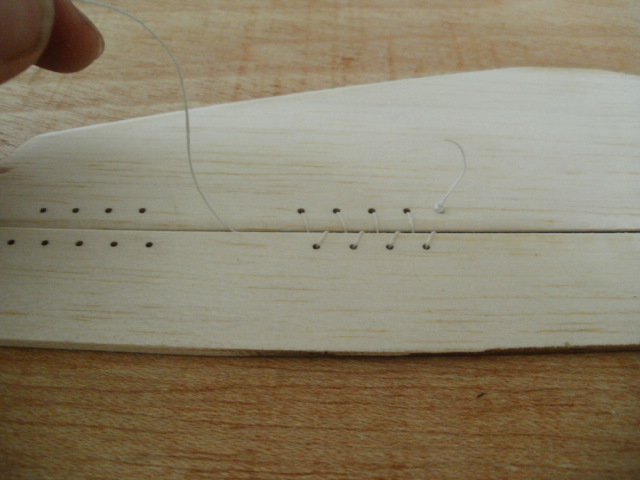
Step 4Thread the string through the first hole of the elevator. Unless you’ve missed something, you will always thread through holes in the same direction, in this case, top downwards. Pull the string tight to reduce the hinge gap.
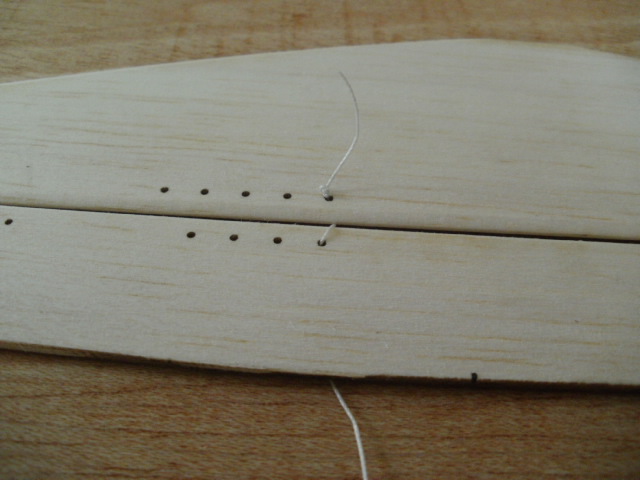
Step 5Pull the string through the hinge gap…
Step 6…then thread the string though the 2nd hole of the tailplane
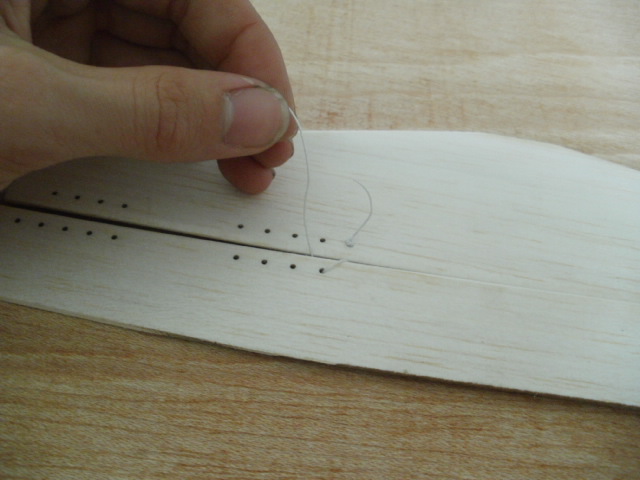
Step 7Keep pulling the string tight to reduce slack. Repeat the previous steps until you reach the final hole, then push the string through the gap.
Step 8Thread the string through the last hole of the elevator, as shown. You will still be threading through holes from the same side as you started, if not, you’ve missed out a step.
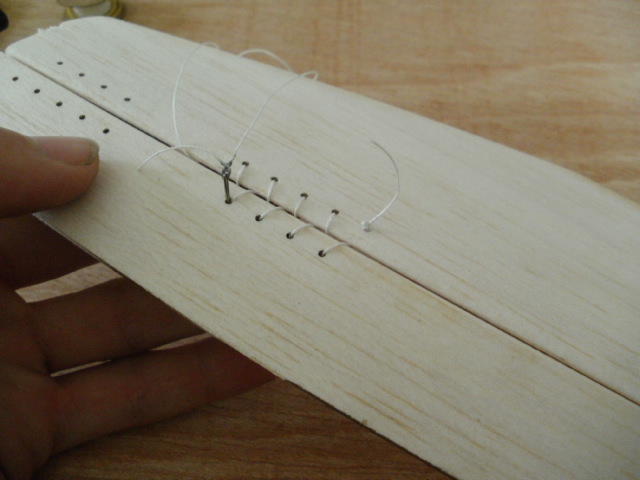
Step 9Continue to thread through the holes and gap until you reach the first knot. Make sure all the sting is tight, whilst moving the surface up and down and side to side to take up any slack. Thread the string through the gap once more and again through the first hole, locking the hinge
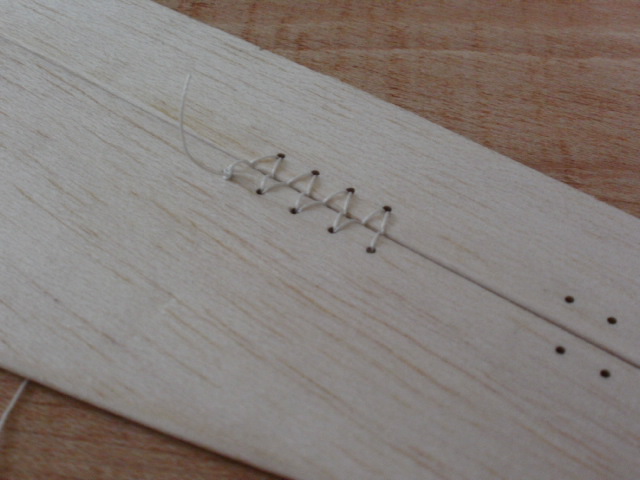
Step 10Use glue to lock the string in place. I use aliphatic resin in a small squeeze bottle, to “inject” glue into the holes. Wipe off any excess, and it may be necessary to apply glue a couple of times to partially fill the holes.
So there you have it, an easy way of hinging surfaces, whilst giving the model a “vintage” look!
All text & images : © Ollie Harris September 2014-2020